

How To Install Centos On Windows 10
CentOS is i of the well-nigh pop alternatives to the Debian line of products. Inspired by RedHat Enterprise Linux it uses the .rpm extension for its packages like Fedora, RedHat Linux and yum parcel manager to install, update and remove packages from your organization.
Most importantly, dissimilar Ubuntu, it is mostly server centric with serious efforts on making certain your Internet facing servers are secure, stable and efficient. CentOS is simple, piece of cake to install and quick to get acquainted with. Allow's install CentOS on Microsoft'due south virtualization platform Hyper-V
Enabling Hyper-V and Getting Installation Media
Probably the nearly time consuming footstep in this tutorial is getting the installation media. CentOS 7 comes in 3 different kind of installers.
- Minimal: With simply basic utilities at about 1GB in size
- DVD: Well-nigh 4GB in size with GUI, decent installer and many everyday utilities
- Everything: But a massive ball of all the possible package that you might go from official repos (useful for setting upwards your ain CentOS mirrors). Virtually 8GB in size.
We volition be using the heart-of-the-road DVD option. Y'all can become your prefered selection from here.
To go started with Hyper-Five, we start need to brand certain that we have Hyper-V enabled on our Windows box. If yous are using Windows 7 Ultimate edition (or above), or similarly Windows 10 Pro or Enterprise edition on your desktop you can enable Hyper-5. Needless to say almost all Windows server editions come with Hyper-V functionality, as well.
Go to the Start Bill of fare and search for "Plow Windows features on or off" and a list of Windows features will exist shown in a new magician. Bank check the box against Hyper-V, and make sure you lot have both the Hyper-V platform and Hyper-5 management tool installed.
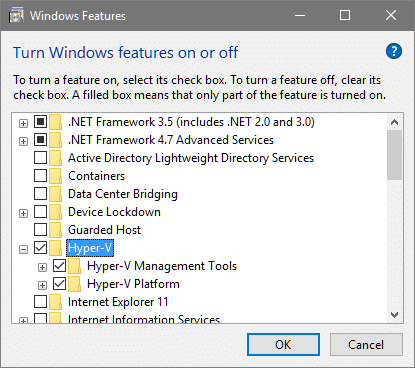
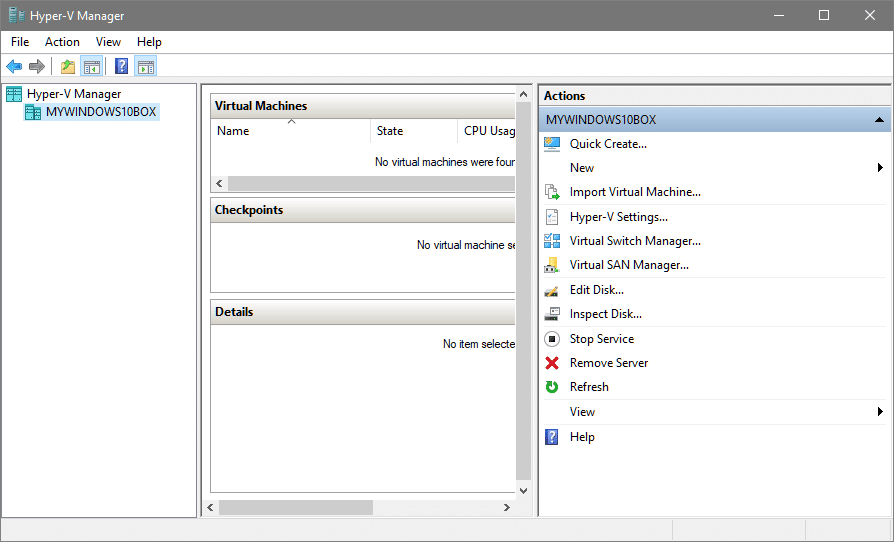
Click on OK and wait while Windows gathers necessary files for you. It volition ask you to reboot the system and upon rebooting, you tin go to the Start Menu and search for "Hyper-V Manager" and it will show y'all a dandy UI.

It will show yous the list of concrete machines that are being managed past information technology equally well virtual machines that are being run on those physical nodes. Since we are using a single desktop, its proper name will pop up every bit a concrete server and at that place are no virtual machines as of yet, so permit'south create some.
Creating the Virtual Machine
The first thing to consider while creating a VM is how much resource yous want to dedicate to information technology, in our case information technology is going to be 2 cores and 2GB of retention with 127GB of storage in the form of virtual hard drive. Y'all tin go abroad with single core and 25GB of storage. Make a judgement based on the resources bachelor to you.
Now, then let'southward create our VM. Select your PC's proper noun from the left column, to specify to Hyper-V that we will exist creating VMs on this particular host. Then from the right column called Deportment select the option which says New → Virtual Car.
This will open up upwards a New Virtual Machine wizard where you decide upon various settings virtually the virtual machine.
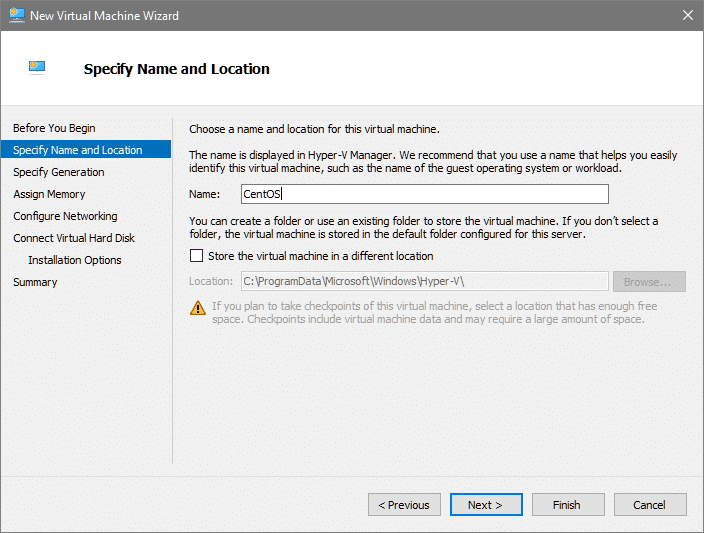
First option is about specifying name and location where the VM related files would live. We have left the location to its default place inside C: drive and named the VM CentOS earlier clicking on Side by side.
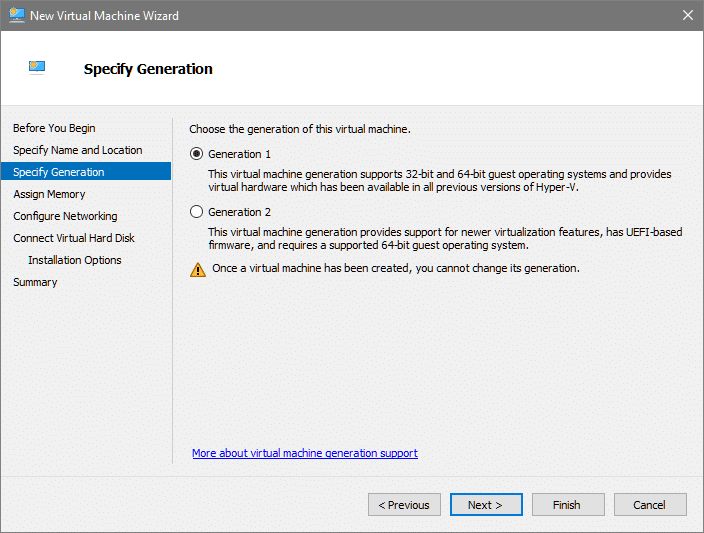
Next nosotros specify the VM'due south generation, which, every bit you lot can meet from the description, is nigh UEFI back up. Its safe to selection Generation 1 in nearly cases, and so we will become with that.
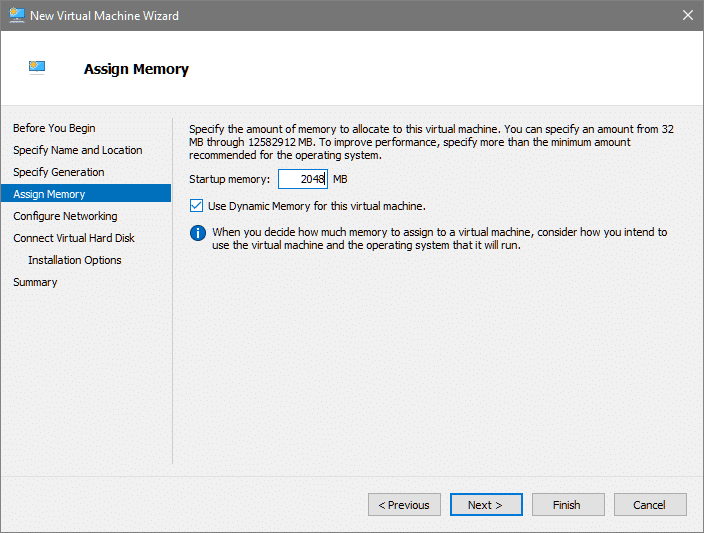
Next, we assign memory to the VM, with Dynamic memory resource allotment enabled. This ensures that at any given time the VM uses just every bit much memory as it needs with the upper most limit prepare by us, as shown below:
Network configuration can become a little tedious if you become down the rabbit hole, however, Hyper-5 provides a Default Switch which nosotros will use to provide connectivity to our VM, in the next step.
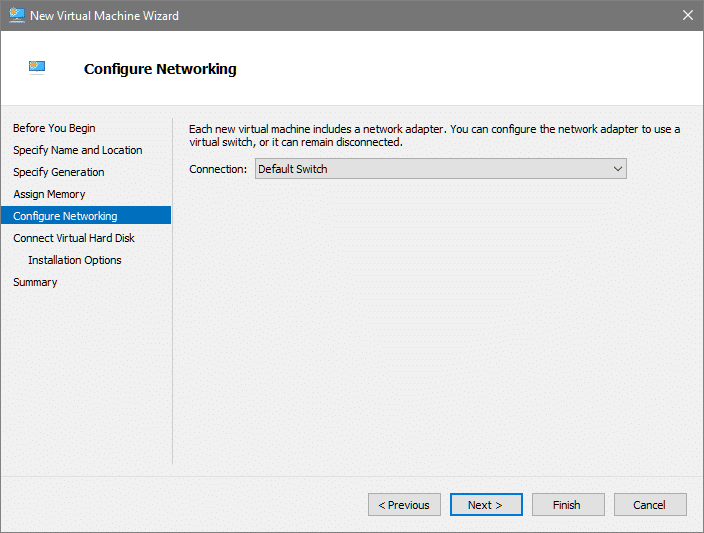
Apply the driblet downwardly option to select Default Switch. Click Side by side and we can motion on towards Virtual Hard Disk.
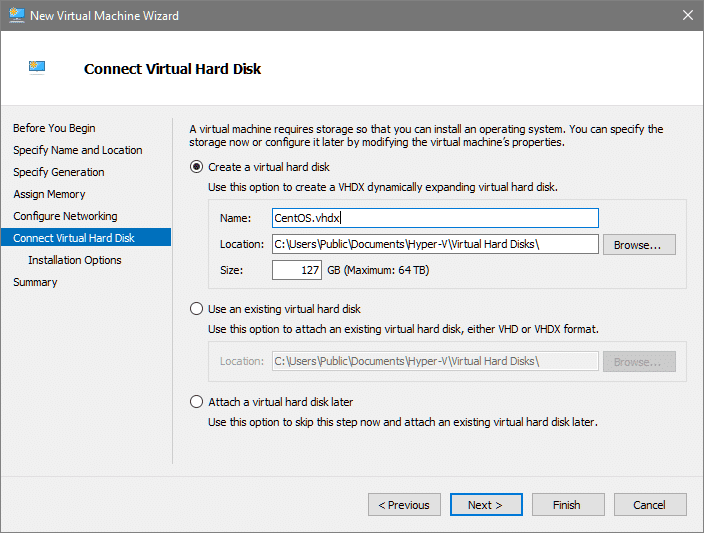
We are going to keep the Virtual Hard disk drive options to default values. Everything from location to size, just to proceed things simple and manageable.
Next is the suboption for selecting the installation media. This volition exist used to kick the VM the beginning time you start it, afterward the installation is done, the virtual hard disk will become bootable and subsequent reboots will utilise that instead.
Select the option "Install an operating system from a boot CD/DVD-ROM" and then select the "Image file" suboption and browse your file organization to locate the CentOS iso that yous downloaded earlier.

You lot can Click on Next to see the summary of your VM, if you are satisfied, click Finish and nosotros can move on to the operating system installation.
Installing CentOS
Installing the Operating system is pretty piece of cake, specially if yous have gotten DVD or Everything variant. The .iso comes with a GUI installer.
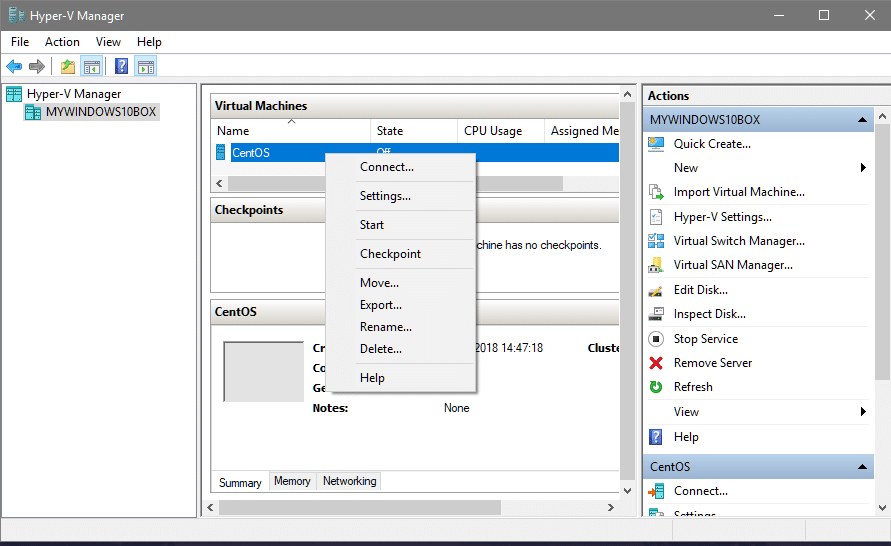
Showtime the VM by right-clicking on it and selecting First and and then right-click over again to Connect…
Now yous are continued to the VM. Select the Install CentOS option from the boot menu and hit <Enter>.

1. Installation Linguistic communication

Select the language you lot prefer and click on Proceed.
2. Installation Options
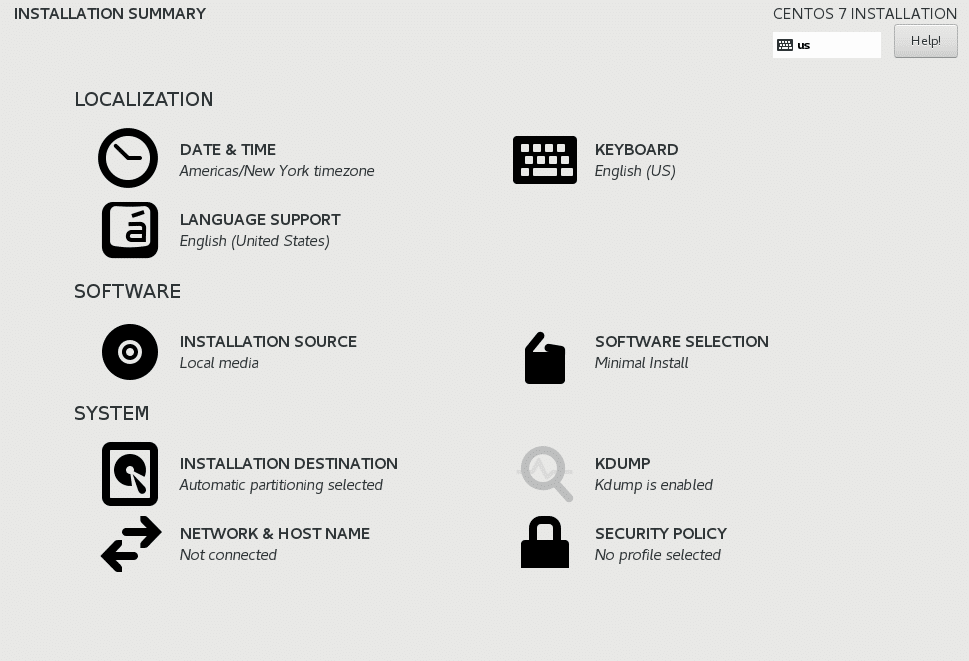
Select the Installation Destination selection and select the virtual hard disk to install CentOS on summit of it.
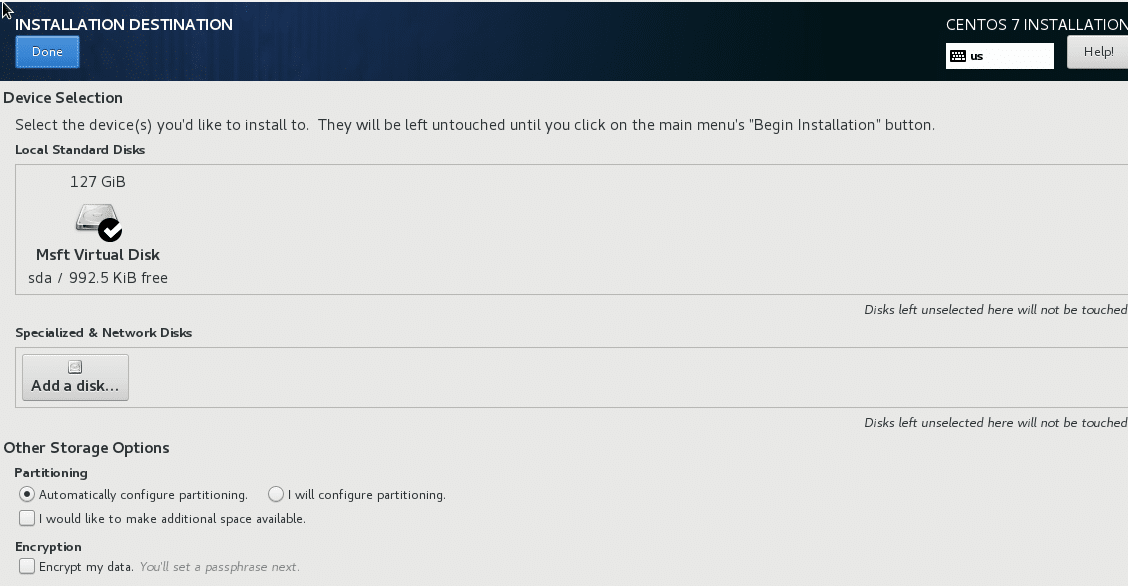
Yous tin cull to encrypt the disk or manually sectionalisation information technology, but nosotros will leave information technology at default and click Washed in one case that is washed.
Next, you will be back to the previous menu where you can at present click on Begin Installation.
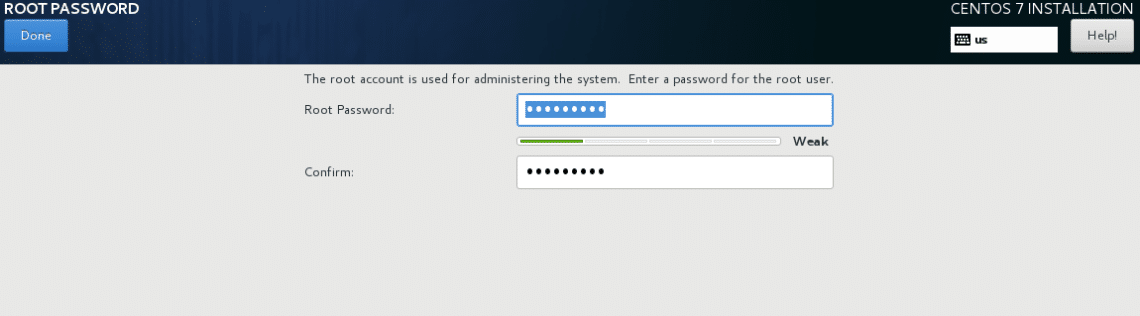
3. Root and User password
While the installation is under progress.
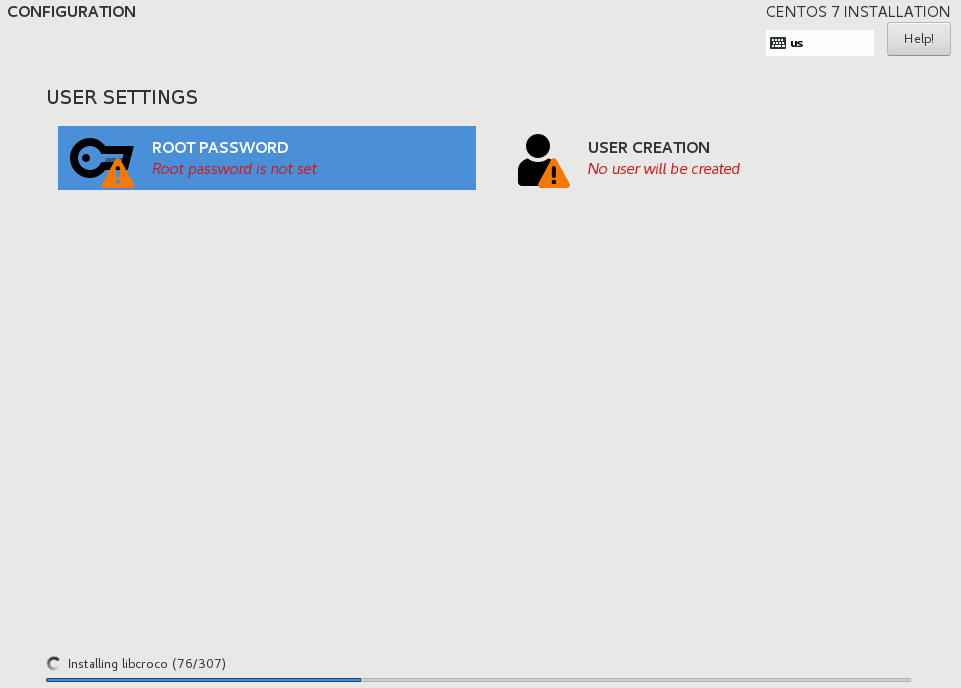
While selecting the Root password is essential, creating another user is purely optional.
Upon reboot you lot will exist greeted with the login prompt where yous can login as root or any other user you may take created during installation.
Conclusion
Now that you take a CentOS installation up and running, you can update the local cache with the remote yum repositories and update the installed software.
$sudo yum check-update
$sudo yum update
Let united states of america know if there are whatsoever similar topics that you desire u.s.a. to cover.
About the author
![]()
I am a tech and science author with quite a diverse range of interests. A strong believer of the Unix philosophy. Few of the things I am passionate about include system assistants, computer hardware and physics.

How To Install Centos On Windows 10,
Source: https://linuxhint.com/install_centos_hyperv/
Posted by: milneribrat1997.blogspot.com
0 Response to "How To Install Centos On Windows 10"
Post a Comment